Print screen in windows 10 using mac keyboard, print screen on windows using mac keyboard, print screen windows 10 using mac, how to print screen on mac pro, how to print screen on laptop, how to print screen one monitor, how to print, how to print labels in word,
If you are a proud owner of a Mac device, you already know that it offers a seamless user experience that is hard to match. However, as with any device, you may encounter situations where you need to print screen on Mac. Whether it's for creating documentation, troubleshooting, or for personal reference, it's a handy feature to have at your disposal.
There are several methods to capture screenshots on Mac, and we are going to take a deep dive into each of them. So settle in and let's get started.
Method 1 – Using Keyboard Shortcuts
One of the easiest and quickest ways to print screen on Mac is by utilizing keyboard shortcuts. Here's the method:
- Press and hold down the Command + Shift + 3 keys simultaneously.
- You will hear a sound like a camera shutter along with an instant preview of the captured image on the bottom-right corner of your screen.
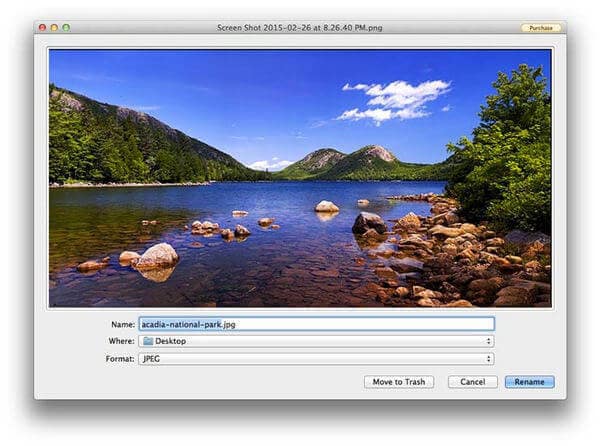
- The screenshot will be saved automatically on your desktop with the name 'Screenshot date at time.png.'
It's that easy. However, if you want more control over the screenshot, check out method 2.
Method 2 – Using Keyboard Shortcuts with Annotations
If you want more control over the screenshot, you can use the keyboard shortcuts with annotations. Here's how:
- Press and hold down the Command + Shift + 4 keys simultaneously.
- Your cursor will turn into a crosshair cursor.
- Click and drag the crosshair cursor to capture the portion of the screen you want to capture.
- Once you release the cursor, you will hear the camera shutter sound, and the screenshot preview will appear on the bottom-right corner of your screen.
- You will also see a toolbar with annotation options such as text, shapes, lines, and color in the upper-right corner of your screen.
- Select an annotation option to edit the screenshot as needed.
- Once you are satisfied with the screenshot, click on the 'Save' button on the toolbar to save the screenshot on your desktop.
This method offers a much more customized experience and gives you more control over the screenshot. However, sometimes you may want to capture a window rather than the whole screen. For that, check out method 3.
Method 3 – Using Keyboard Shortcuts to Capture Window or Menu
Sometimes capturing the entire screen may not be required, and you may want to save only a particular window or a menu. Here's how to do that:
- Press and hold down the Command + Shift + 4 + Space keys simultaneously.
- The cursor will change to a camera icon.
- Hover over the window or menu that you want to capture.
- Click on the window or menu to capture the screenshot.
- The camera shutter sound effect will play, and the preview will appear on the bottom-right corner of your screen.
- Click on the 'Save' button on the toolbar to save the screenshot on your desktop.
This method saves you time by capturing only the window or menu that you need to share or save. However, what if you want to take a screenshot of an entire webpage? Check out method 4.
Method 4 – Using Screenshot Utility for Entire Webpages
You can use the Screenshot utility to capture full web pages, including the part that is not visible on the screen. Here's how:
- Open the webpage that you want to capture.
- Press and hold down the Command + Shift + 5 keys simultaneously to open the Screenshot utility.
- Click on the 'Capture Entire Screen' or 'Capture Selected Window' option.
- If you select the 'Capture Selected Window' option, hover over the window that you want to capture.
- Click to capture the screenshot.
- If you choose the 'Capture Entire Screen' option, you will get a 5-second timer to adjust the webpage display before capturing the screenshot.
- The preview will appear, allowing you to add annotations or crop as needed.
- Click on the 'Save' button on the toolbar to save the screenshot on your desktop.
This method is particularly useful for bloggers, designers, or web developers who need to capture full web pages for documentation purposes. And, speaking of customization, what if you want to change the destination folder of your screenshots? Check out method 5.
Method 5 – Changing the Destination Folder for Screenshots
By default, your Mac saves the screenshots on the desktop. However, you may want to save them in another location for easier access or organization. Here's how:
- Open Terminal.
- Type in 'defaults write com.apple.screencapture location' in the terminal without the quotes.
- Enter the path to the location where you want to save your screenshots, followed by hitting the Return key.
- Restart your Mac for the changes to take effect.
This method is useful for people who like to keep their desktop free from clutter or need to organize their screenshots into custom folders.
Conclusion
Capturing screenshots on a Mac is a simple and straightforward process, regardless of the method you choose. However, each method has its advantages, and you can choose the one that suits your needs best. Whether it's keyboard shortcuts or using the Screenshot utility, we hope this guide has been helpful to you. Happy capturing!
Print Screen on Mac
Capturing screenshots on a Mac is an incredibly useful feature, but it can sometimes be confusing. With a range of methods to capture screenshots, it's important to know which one is appropriate for your needs. This guide has covered five different methods that will help you capture screenshots on your Mac device. From basic keyboard shortcuts to the Screenshot utility, you are now equipped with the knowledge to capture a screenshot of almost anything on your screen. So go ahead, and capture away!
Also read:
.Popular Posts
-
Thaumcraft 4 aspect cheat sheet, thaumcraft 4 aspect cheat sheet, thaumcraft 4 aspects cheat sheet, thaumcraft 4 2 aspects, thaumcraft 4 how...
-
Sample resume for teenager first job, sample resume for teenager with no experience, sample resume format, sample resume for administrative ...
-
Outer banks hotels with a bars, outer banks gay bars, night clubs outer banks nc, outer banks north carolina map, outer banks north carolina...


